#
Chapter 5. Your First Plugin
Now that we've gotten this far, we can write our first plugin for Rebar. Pay close attention to what you're doing and try to follow the images and text as closely as possible.
#
Create your Plugin Folder
Run the following command(s) in your Terminal:
mkdir src/plugins/my-first-pluginmkdir src/plugins/my-first-plugin/servermkdir src/plugins/my-first-plugin/clientAlternatively, feel free to use the file tree to create your plugin under the src/plugins folder.
#
Create your Index Files
Index files are the main entry points for both server and client. We are going to create an index.ts file in both directories.
Run the following command(s) in your Terminal, and press Enter again after entering it:
echo > src/plugins/my-first-plugin/server/index.tsecho > src/plugins/my-first-plugin/client/index.tsAlternatively, feel free to use the file tree to create your index.ts files under the src/plugins/my-first-plugin folders.
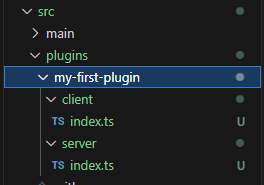
Here's a preview of what you should have as a folder structure.

#
Setup server/index.ts
Inside of our server/index.ts file we're going to need to add some source code. Copy and paste the following code to get the initial setup ready.
import * as alt from 'alt-server';
import { useRebar } from '@Server/index.js';

alt.log('Hello from server!');
#
Setup client/index.ts
Inside of our client/index.ts file we're going to add some client source code. Copy and paste the following.
import * as alt from 'alt-client';

alt.log('Hello from client!');
#
Run the Server!
Run your server, and you can do that by running the following in a Terminal.
pnpm devWhile this may not seem like much for our first plugin, it will print some data to your client console F8 in-game.
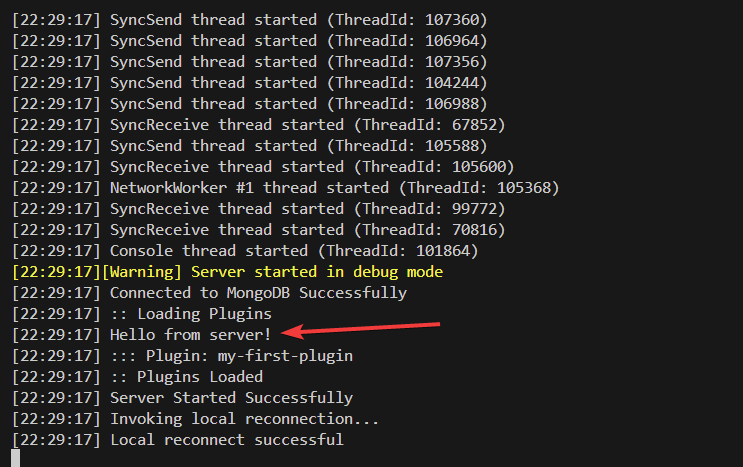
We can also find the printed data in our server console as well.
If you are successful, you will see Hello from server! printed in the console.
